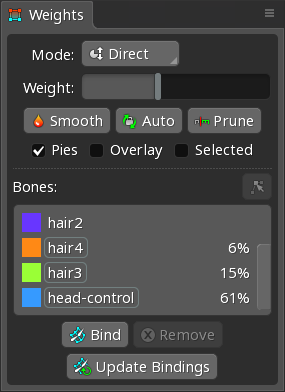
Weights view
Weights are used to bind attachment vertices to bones so when the bones are transformed, the vertices are also transformed. Weights allow bones to deform attachments automatically as the bones are manipulated, making it easier and more efficient than moving individual vertices to animate complex deformations.
Carefully plan your weights when setting up complex meshes.
Other names for allowing bones to affect mesh vertices include: linear blend skinning, blended skinning, multi-matrix skinning, skeletal subspace deformation, or sometimes simply "skinning". To avoid confusion with the unrelated skins feature in Spine, we use the name "weights".
While weights are most commonly used with mesh attachments, they also work with path, bounding boxes, and clipping attachments. For the rest of this page "mesh" is used in the text, but weights work with any of those types of attachments.
See the weights tips for some clever ways to make use of weights.
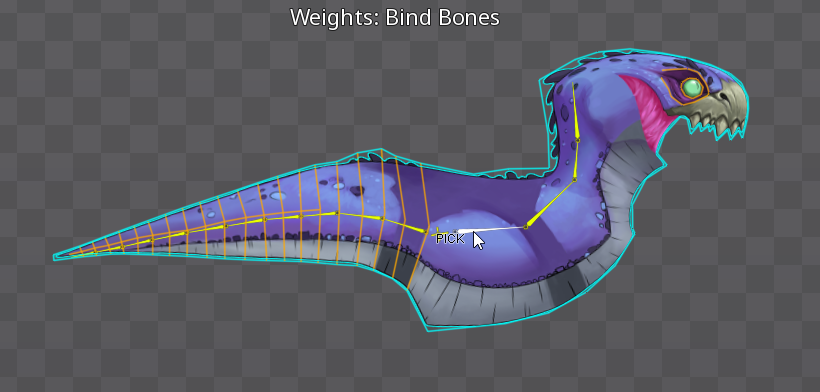
Bind
Before weights can be adjusted, bones need to be bound to a mesh. There are two ways to do this:
- Select the mesh first
Select a mesh with any tool, then clickBindin the weights view to enter bind mode. Next, click each bone you want to bind to the mesh. When finished, exit bind mode by clickingBindagain or pressingspacebarorescape. - Select the bones first
Select any number of bones with any tool, then clickBindin the weights view to enter bind mode. Next, click a mesh to bind the bones to that mesh.
When bones are bound to a mesh for the first time, weights are computed automatically. After that, when the bones are transformed the vertices are affected and the image deforms.
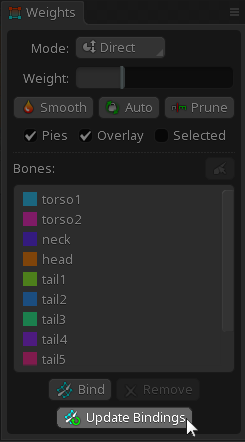
Bones list
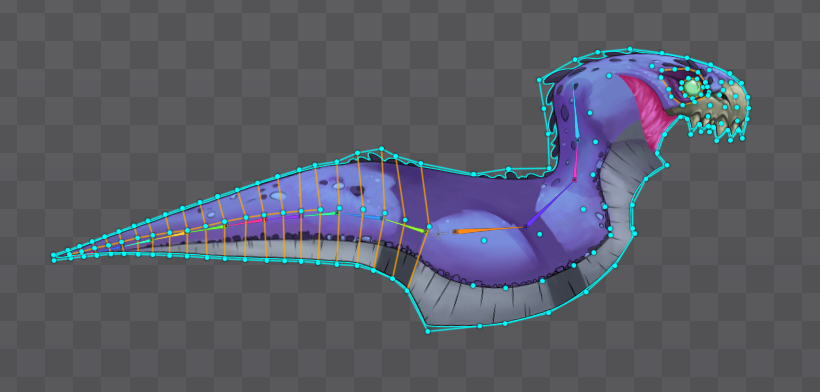
The bones list shows the bones bound to the selected mesh.
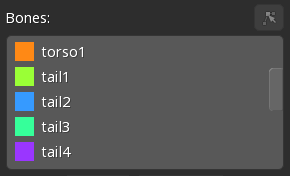
Each bone is assigned a color. When the Weights tool is selected, the bones are shown in the viewport with matching colors.
When a vertex is selected in the viewport, the bone list shows the weight each bone has for that vertex. If multiple vertices are selected and a bone has different weights for them, an asterisk (*) is shown instead. The names of bones that have weights are highlighted in the bones list.
Bones can be unbound by selecting them in the bones list and clicking Remove. The unbound bones will no longer affect the mesh. If all bones are removed, the mesh will return to being affected only by the transform of the bone to which it is attached.
Right clicking a bone selects that bone in the tree and viewport.
Triangle order
The order of the bones in the bone list can be changed by dragging and bone up or down. The order of the bones determines which of the mesh's triangles are drawn on top of other triangles in the same mesh, which is important if the mesh ever overlaps itself.
A mesh's triangles are sorted by first determining which bone has the highest weights for the triangle's vertices. The order of that bone in the weights view is then used to determine which triangles are drawn on top of other triangles.
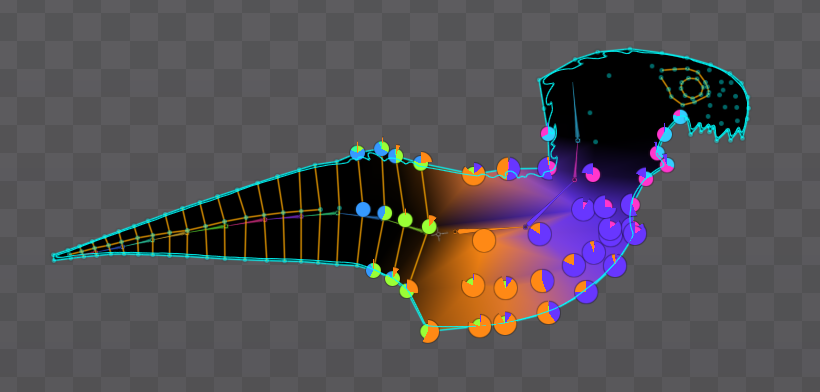
Pies
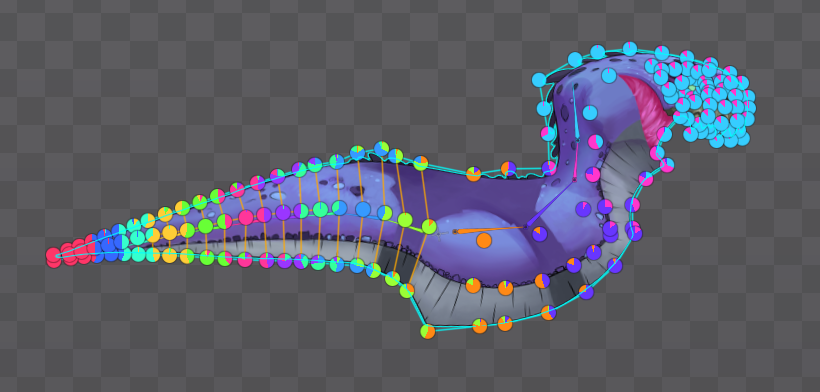
When checked and the Weights tool is selected, pie charts are shown for each vertex to indicate the weights from each bone. The slices in the pie charts match the colors of each bone in the bones list. Selected vertices have larger pie charts.
Overlay
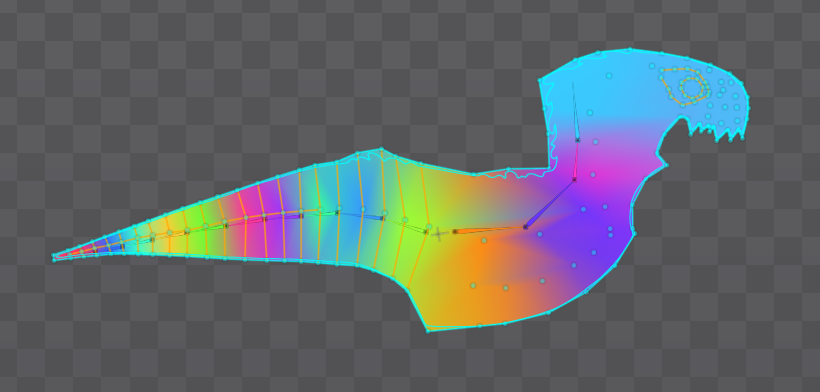
When checked and the Weights tool is selected, the mesh is filled with the bone colors to show the weight of each bone.
Selected
When checked, pie charts are only drawn for selected vertices and vertices that have weights for bones that are selected in the bones list. Also, the overlay uses black for all bones that are not selected, which can make it easier to see faint colors.
Weights tool

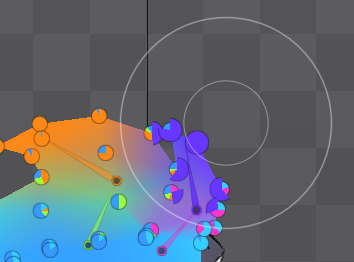
Each vertex has a weight for each bone that determines the influence of the bone. While automatic weights often does a good job, the Weights tool can be used to manually adjust weights.
To change weights for the selected vertices, first select the bones whose weight will increase or decrease. This can be done by clicking the bones in the bones list or in the viewport. Next, drag in the viewport to change the weight for the selected vertices, depending on the mode.
Mode
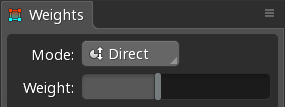
The Mode and the sliders below it determine how the Weights tool works.
Before the Weights tool can be used, first select the bones whose weights will be adjusted. This can be done by clicking the bones in either the bones list or in the viewport.
Direct
The Direct mode gives precise control of individual weight values. After selecting vertices and bones in the bones list, drag up or down in the viewport to adjust the weights for those bones. Alternatively, the Weight slider can be used to set an exact weight.
To select vertices when none are selected, drag to box select. Additional vertices can be selected by holding ctrl (cmd on Mac), then clicking or dragging to box select. All vertices in a mesh can be selected at once by pressing ctrl + A (cmd + A on Mac). The selected vertices can be deselected by pressing spacebar or escape, or by clicking in any empty space.
Brushes
The Weights tool has three brush modes:
Addadds weights for the selected bones.Removeremoves weights for the selected bones.Replacesets weights for the selected bones to a specific value.
Each brush mode has three settings:
Strengthsets the maximum weight that will be applied.Sizesets the size of the brush.Featheris the percentage of the brush size where the weight decreases from theStrengthto 0%.
If no vertices are selected, the brushes affect all vertices. Otherwise, the brushes only affect the selected vertices.
Click to select a vertex or hold ctrl (cmd on Mac) to box select. The selected vertices can be deselected by pressing spacebar or escape, or by clicking in any empty space.
Adjusting weights
When adding to a bone's weight, the weights of other bones that affect the vertex are decreased so the weights sum to 100%. It is almost always more intuitive to adjust weights only by adding to them.
When subtracting from a bone's weight, the weights of other bones that affect the vertex are increased so that the weights sum to 100%. If a bone has 100% weight, the weight cannot be reduced because there are no other bones to give the weight to.
Weights copy and paste
Weights can be copied from one or more selected vertices by pressing ctrl + C (cmd + C on Mac) then pasted on a matching number of selected vertices by pressing ctrl + V (cmd + V on Mac).
Testing weights
After adjusting weights, the bones can be transformed to see how the weights behave.
When switching to other tools, the selection for the Weights tool is saved. This enables switching to a transform tool, trying out the weights by manipulating the bones, then switching back to the Weights tool to further adjust the weights, without needing to change the selection.
Transforming the bones can be done in setup mode, then undo used to revert the changes to the bones. However, it is better to use animate mode to transform the bones, so your setup mode is not affected. When auto key is disabled, clicking anywhere on the timeline will reset the transformed bones back to the setup pose.
It can be very helpful to create an animation that moves the bones through their maximum range as you adjust weights. This lets you focus on how the weights behave, without needing to switch to bone transform tools at all. The Direct mode for the Weight tool is easiest to use while an animation is playing. Also, the preview view can be used to see an animation playing as you adjust weights, without having an animation playing in the viewport.
Auto
The Auto button computes weights automatically. This does not use simple distance between vertices and bones, Spine uses a sophisticated algorithm that considers the mesh topography to choose the best weights.
If any vertices are selected in the viewport, the weights are computed only for the selected vertices. This can be helpful when you need to fix the weights for part of the mesh, but don't want to lose the weights you've set manually for the rest of the mesh.
If any bones are selected in the bones list, the weights are computed only for the selected bones. This can be helpful when auto weights would not compute weights for a bone the way that is needed. In that case, auto weights can be applied without the bone selected to give weights that are close to what you need, then further weights can be set manually.
Smooth
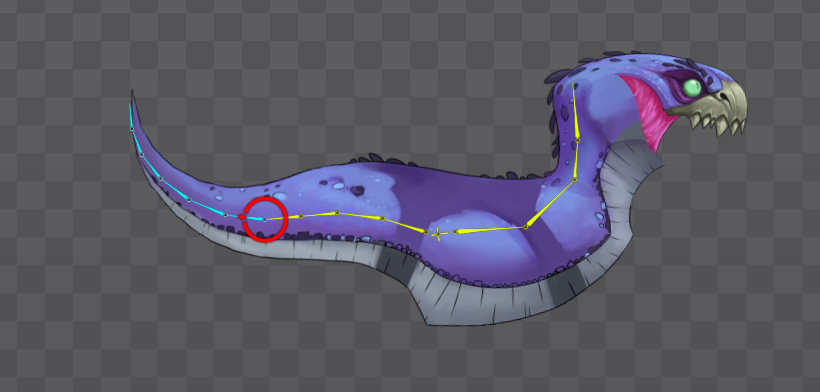
The Smooth button averages the weights of the selected vertices with their neighbors. The neighbors of a vertex are those connected by a hull edge (cyan) or manually created internal edge (orange). If no vertices are selected, all are affected. Smooth spreads the weight of bones and can result in smoother deformations. It can be clicked multiple times to increasingly spread the weights.
Smoothing can cause unnecessary vertex transforms. Prune can be used to remove small weights.
Prune
The Prune button removes weights below a threshold. When setting up weights, it is common to end up with some bones having a small effect on some vertices, especially after using Smooth. These weights are unlikely to make a visible difference but still cause extra vertex transforms to be calculated. Removing unnecessary weights reduces the number of vertex transforms needed to render the mesh.
The Bones slider determines the maximum number of bones that can have weight for each vertex. When a vertex has weights for more bones than specified, the lowest weights are removed and distributed to the other bones that have weights.
The Threshold slider sets the threshold below which the weights are removed from a vertex. The removed weights are distributed to the other bones that have weights.
Adjusting these sliders provides a live preview of the result and the number of bones that will be removed is shown.
Multiple meshes can be pruned by using the tree filter to show only meshes, then selecting all the meshes and clicking Prune.
Weld
The Weld button matches weights across meshes, effectively welding them together. This allows multiple meshes to deform identically, as if they were a single image. Weld requires the selected mesh and the target mesh to be bound to at least the same two or more bones in order to work.
The weld button has two options:
AllOverlapping
Swap
Weights can be swapped between two bones in the weights list. To swap weights, first select two bones in the weights view list, then press the Swap button.
Lock
Weights can be locked to prevent them from changing while altering the weights of bones that are not locked. To lock the weights for a bone, hover with the mouse on the colored square next to a bone in the weights view, then click on the lock. Repeat the process to unlock a bone. The lock only affects the given bone for the selected mesh.
Update bindings
The Update button rebinds the current vertices to the bones, discarding the old binding positions.
When bones are bound to a mesh, the mesh vertices at that time are stored in relation to each bone. When a bone is moved, the vertices also move to stay in the same position relative to the bone. The bone weights determine how much each bone influences the vertices. For example, if the weight for a bone is 100%, the vertices will move with the bone exactly.
For more Update Bindings examples, see our mesh binding tutorial and rotating diamond tutorial.
If bones have been transformed after being bound to a mesh, adjusting the weights will change the vertex positions. This happens because each bone wants the vertices to be in different positions. Sometimes it is acceptable for the vertices to move when adjusting weights. Other times it is not, and that is when Update Bindings is useful.
Example without update bindings
In this example update bindings is not needed. Adjusting the weights causes the vertices to move, but this acceptable.
Consider a skeleton with a long tail. The more an image is bent, the more it distorts, so it is best to start with an image near the center of the bending range. A long tail needs to bend a lot in both directions, so it's best to use a long, skinny rectangle, bound to bones and weighted.
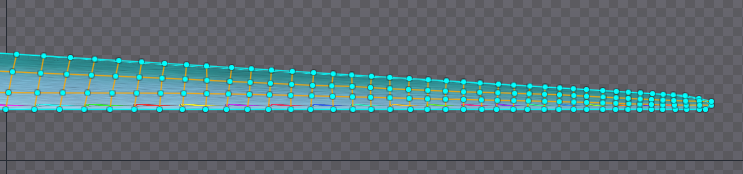
However, it may look odd to have the tail perfectly straight in setup mode, so the bones can be rotated so the tail is bent in setup mode.
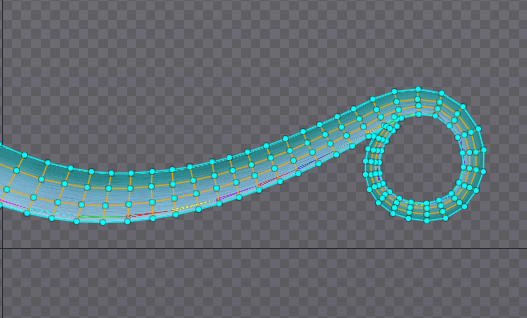
Since the bones were rotated to bend the tail, the bones transforms have changed since the mesh was bound. Now each bone wants the vertices to be in different positions, so when the weights are adjusted, the vertices move. This is acceptable because adjusting the weights controls how the bent tail deforms and it is not important that this setup pose keep an exact position.
Example with update bindings
In this example update bindings is used to prevent vertices from moving when the weights are adjusted.
Consider a skeleton with a weighted mesh for an arm. If the arm bones are rotated in setup mode to achieve the exact setup pose desired, then adjusting weights to fix how the arm bends in animations will move the vertices in setup mode, ruining the setup pose. In this case, Update Bindings can be used to set a new bind pose after rotating the arms. Then when the weights are changed, the vertices in setup mode will not move.
Duplicating bones
When a bone is duplicated, all child bones, slots, and attachments under the bone are also duplicated. When attachments with weights are duplicated this way, the weights are modified to use the corresponding duplicated bones, if possible.